> ## Documentation Index
> Fetch the complete documentation index at: https://docs.nadles.com/llms.txt
> Use this file to discover all available pages before exploring further.
# Add API
> You can add a new API either by importing an OpenAPI specification or by filling out the form manually.
## From OpenAPI file
Nadles supports importing OpenAPI **v3.0** specifications. It is the easiest way to get your API up and running.
* Navigate to **My APIs**.
* Click **Import OpenAPI file**.
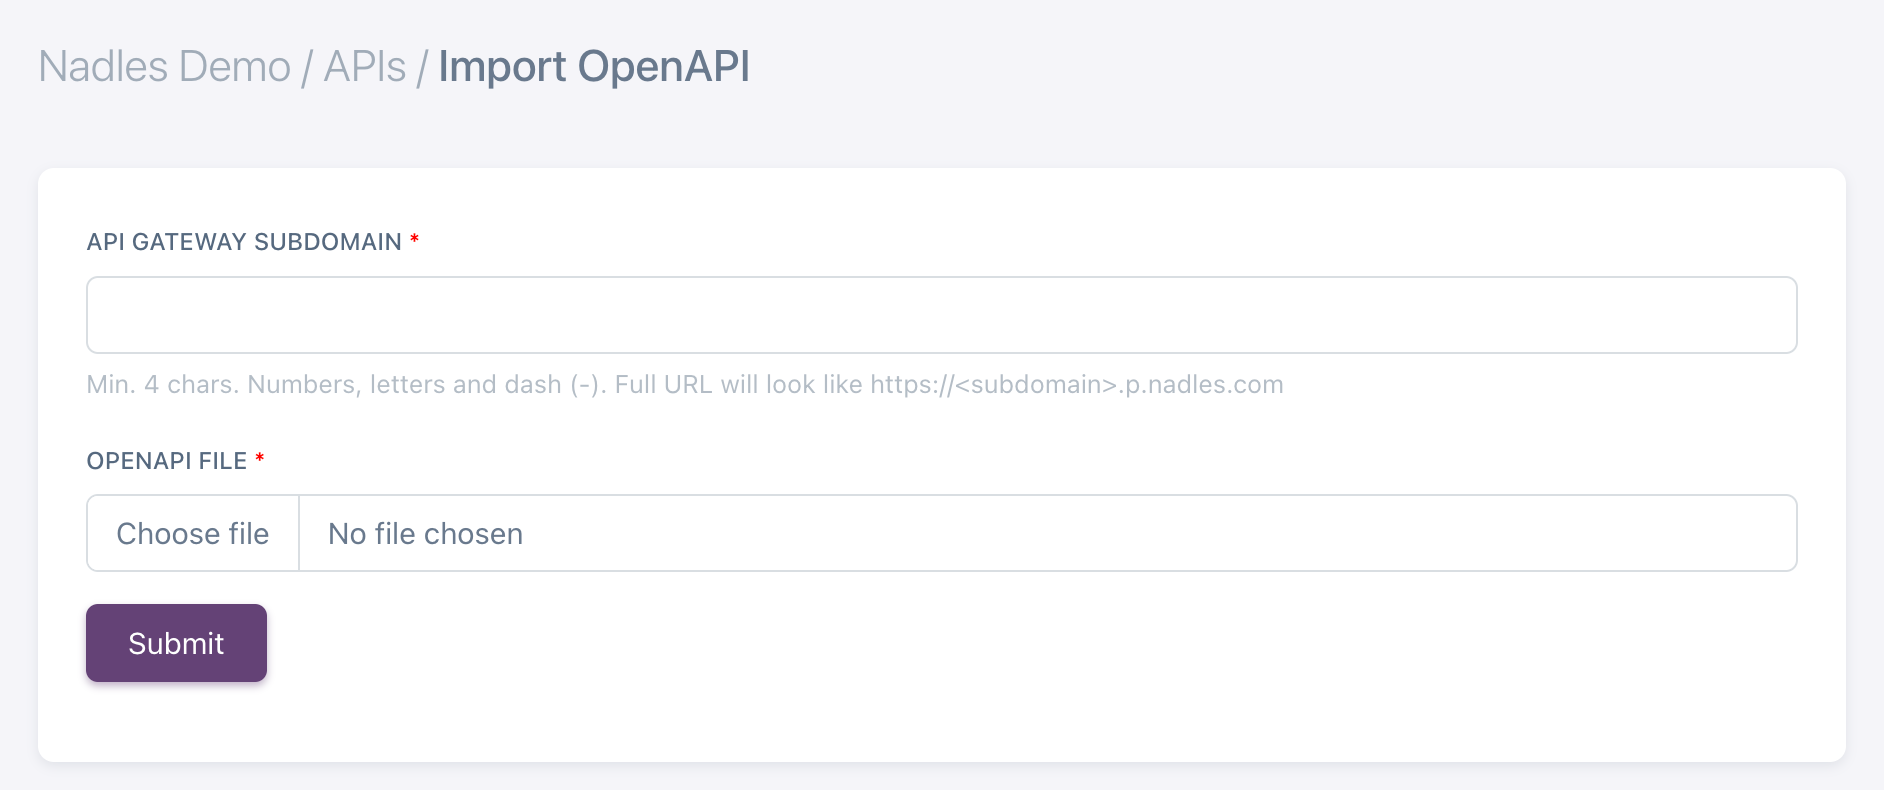 * Choose the subdomain for your API, select the OpenAPI file and click **Submit**.
By default, Nadles let's you choose a subdomain for your API, so the URL to access your API looks like `https://.p.nadles.com/`
Later, you can configure Nadles API Gateway to use a custom domain for your API, e.g. `https://api.mydomain.com`. [Learn more](/api-management/custom-domain).
The OpenAPI definition is imported along with all endpoints. If there are several elements in the "servers" array, the first one is used.
After importing the file, please check the correctness of the configuration on the API settings and Endpoints pages.
## Manually
### Adding a new API
* Navigate to **My APIs**.
* Click **"Add new API"**.
* Fill in the details of your API.
* Choose the subdomain for your API, select the OpenAPI file and click **Submit**.
By default, Nadles let's you choose a subdomain for your API, so the URL to access your API looks like `https://.p.nadles.com/`
Later, you can configure Nadles API Gateway to use a custom domain for your API, e.g. `https://api.mydomain.com`. [Learn more](/api-management/custom-domain).
The OpenAPI definition is imported along with all endpoints. If there are several elements in the "servers" array, the first one is used.
After importing the file, please check the correctness of the configuration on the API settings and Endpoints pages.
## Manually
### Adding a new API
* Navigate to **My APIs**.
* Click **"Add new API"**.
* Fill in the details of your API.
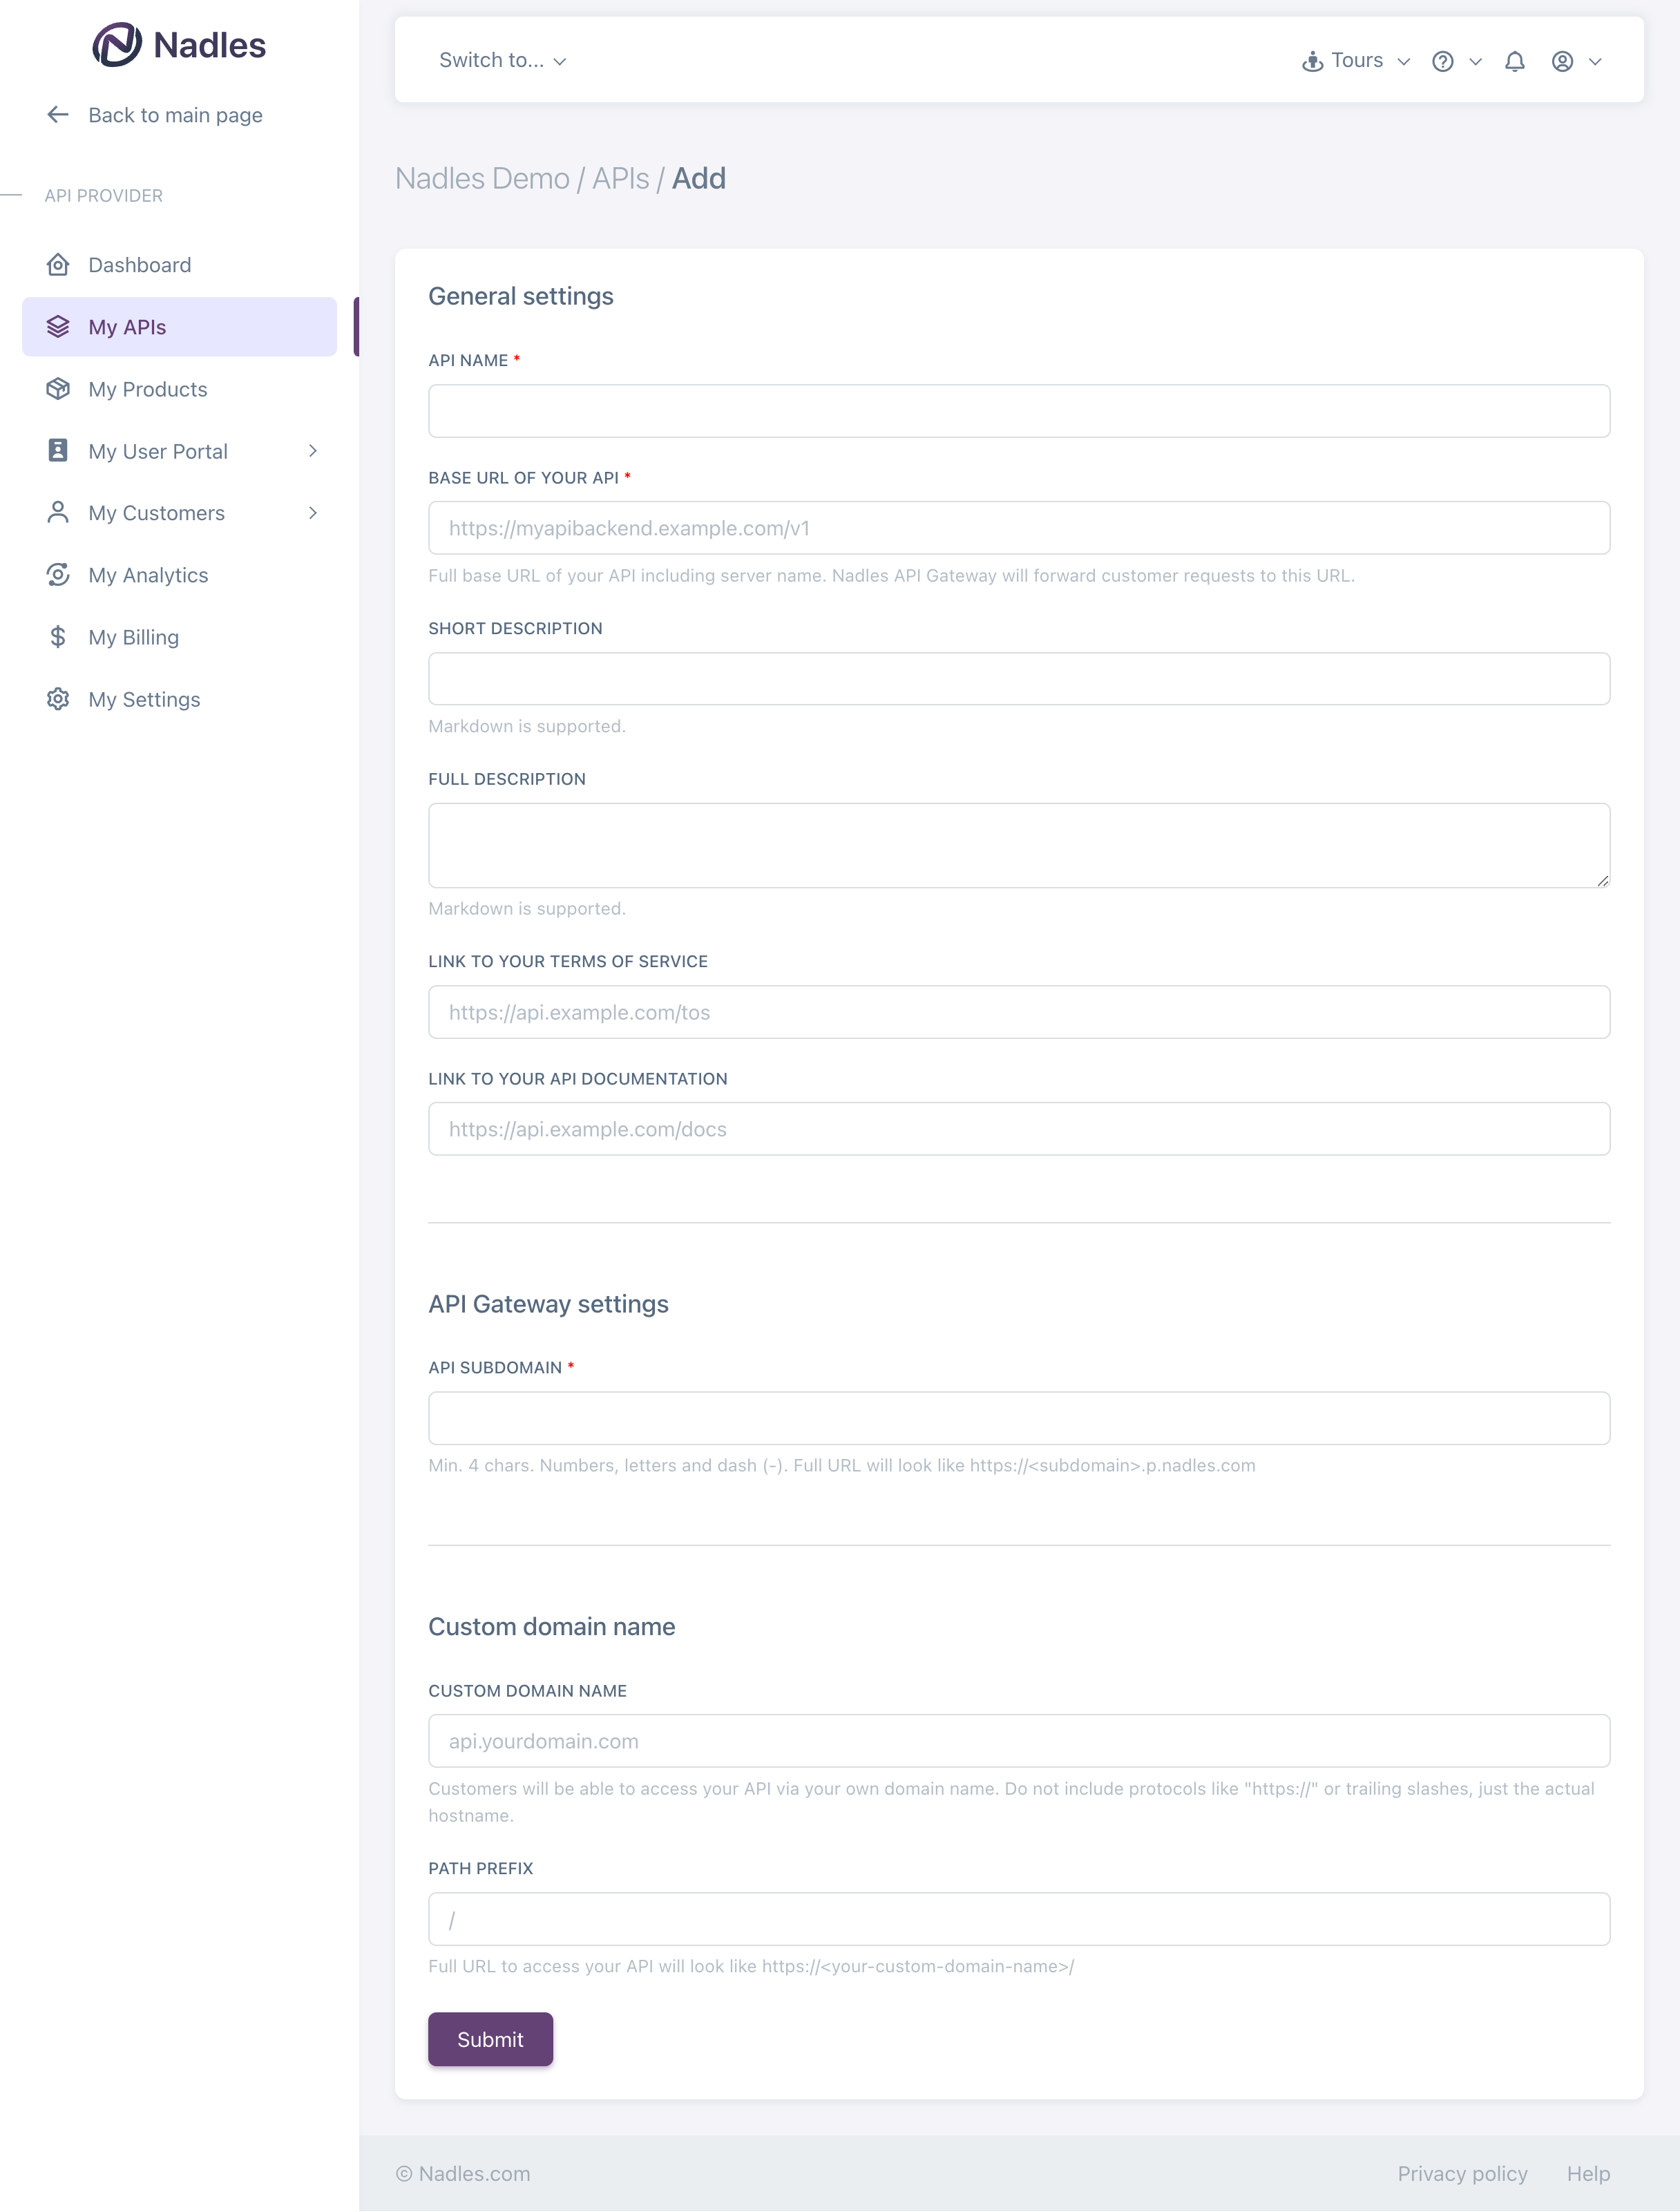 **Name**
The name of your API. This name your customers will see on the checkout page.
**Base URL**
The base URL for all API endpoints.
The full URL to which Nadles API Gateway will proxy users' requests, is formed as `Base URL + Endpoint URL`.
If your API has the following endpoints:
`https://api.mydomain.com/weather-forecast/`
`https://api.mydomain.com/current-weather/`
then `https://api.mydomain.com/` is the base URL.
Do not add path parameters or query string to the base URL of your API. That can be done using "Transformations".
**Short description**
Shown to your customers on the checkout page if no full description is provided.
**Full description**
Shown to your customers on the checkout page.
**Link to your Terms of Service**
Link to your website page with the Terms of Service for your API. Shown to your customers on the checkout page.
**Link to your API documentation**
Link to your website page with the API documentation. Shown to your customers on the checkout page.
**API subdomain**
By default, your API is accessible on Nadles domain and the access URL looks like `https://.p.nadles.com/`
Later, you can configure Nadles API Gateway to use a custom domain for your API, e.g. `https://api.mydomain.com` [Learn more](api-management/custom-domains)
* Click **Submit**.
* After the API is added, you are redirected to the dashboard.
* On the dashboard there is now the Nadles API URL that should be used by your customers to make requests to the API.
To attach a custom domain to your API, check out [this page](api-management/custom-domains).
### Adding endpoints
* Go to **Endpoints** section in the menu and click **Add new endpoint**.
* Choose a HTTP method and enter the endpoint URL relative to the base URL.
**Name**
The name of your API. This name your customers will see on the checkout page.
**Base URL**
The base URL for all API endpoints.
The full URL to which Nadles API Gateway will proxy users' requests, is formed as `Base URL + Endpoint URL`.
If your API has the following endpoints:
`https://api.mydomain.com/weather-forecast/`
`https://api.mydomain.com/current-weather/`
then `https://api.mydomain.com/` is the base URL.
Do not add path parameters or query string to the base URL of your API. That can be done using "Transformations".
**Short description**
Shown to your customers on the checkout page if no full description is provided.
**Full description**
Shown to your customers on the checkout page.
**Link to your Terms of Service**
Link to your website page with the Terms of Service for your API. Shown to your customers on the checkout page.
**Link to your API documentation**
Link to your website page with the API documentation. Shown to your customers on the checkout page.
**API subdomain**
By default, your API is accessible on Nadles domain and the access URL looks like `https://.p.nadles.com/`
Later, you can configure Nadles API Gateway to use a custom domain for your API, e.g. `https://api.mydomain.com` [Learn more](api-management/custom-domains)
* Click **Submit**.
* After the API is added, you are redirected to the dashboard.
* On the dashboard there is now the Nadles API URL that should be used by your customers to make requests to the API.
To attach a custom domain to your API, check out [this page](api-management/custom-domains).
### Adding endpoints
* Go to **Endpoints** section in the menu and click **Add new endpoint**.
* Choose a HTTP method and enter the endpoint URL relative to the base URL.
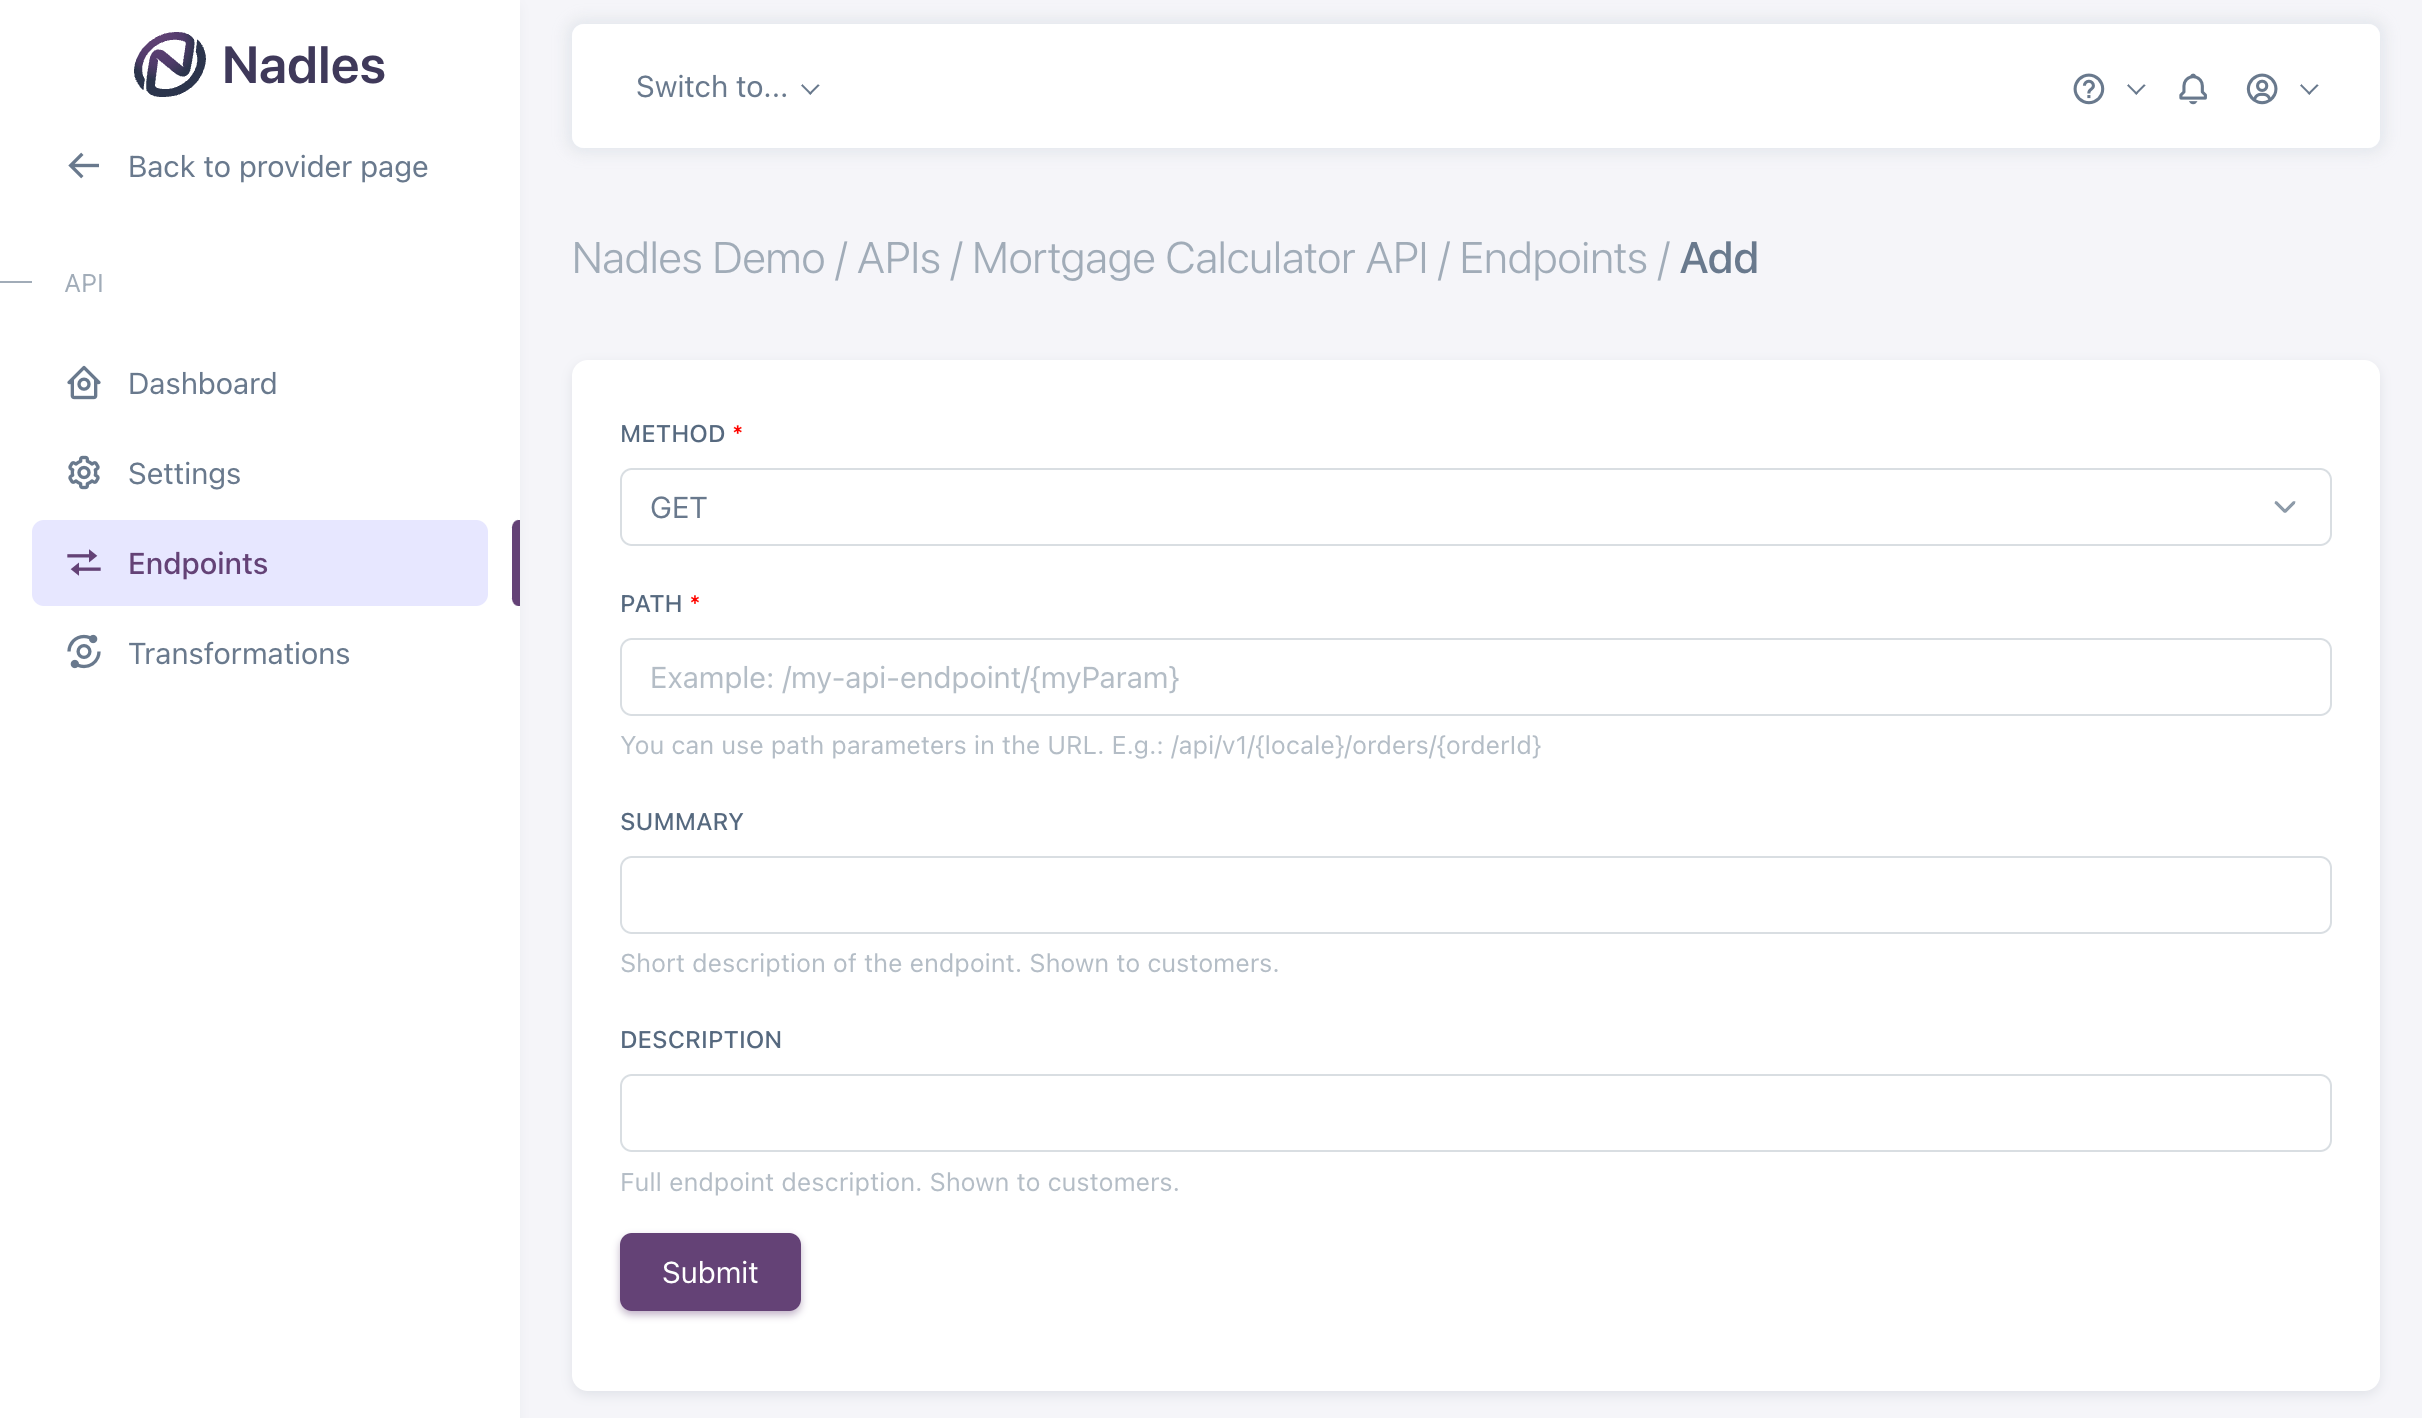 If your API has the following endpoints:
`https://api.mydomain.com/weather-forecast/`
`https://api.mydomain.com/current-weather/`
then `https://api.mydomain.com` is the base URL and `/weather-forecast/` and `/current-weather/` are the endpoint URLs.
* Path parameters can be used in endpoint URLs. These parameters can be used later to configure billable metrics, request transformations and rejection rules.
You can specify endpoint URLs like this:
`GET /weather-forecast/{city}`
In this case, you will be able to later configure Nadles API Gateway to limit access to weather forecast for certain cities or charge different price for different cities.
* Click **Submit**.
Once all endpoints are added, it's time to [set up user authentication](https://docs.nadles.com/api-management/authentication/).
If your API has the following endpoints:
`https://api.mydomain.com/weather-forecast/`
`https://api.mydomain.com/current-weather/`
then `https://api.mydomain.com` is the base URL and `/weather-forecast/` and `/current-weather/` are the endpoint URLs.
* Path parameters can be used in endpoint URLs. These parameters can be used later to configure billable metrics, request transformations and rejection rules.
You can specify endpoint URLs like this:
`GET /weather-forecast/{city}`
In this case, you will be able to later configure Nadles API Gateway to limit access to weather forecast for certain cities or charge different price for different cities.
* Click **Submit**.
Once all endpoints are added, it's time to [set up user authentication](https://docs.nadles.com/api-management/authentication/).