From OpenAPI file
Nadles supports importing OpenAPI v3.0 specifications. It is the easiest way to get your API up and running.- Navigate to My APIs.
- Click Import OpenAPI file.
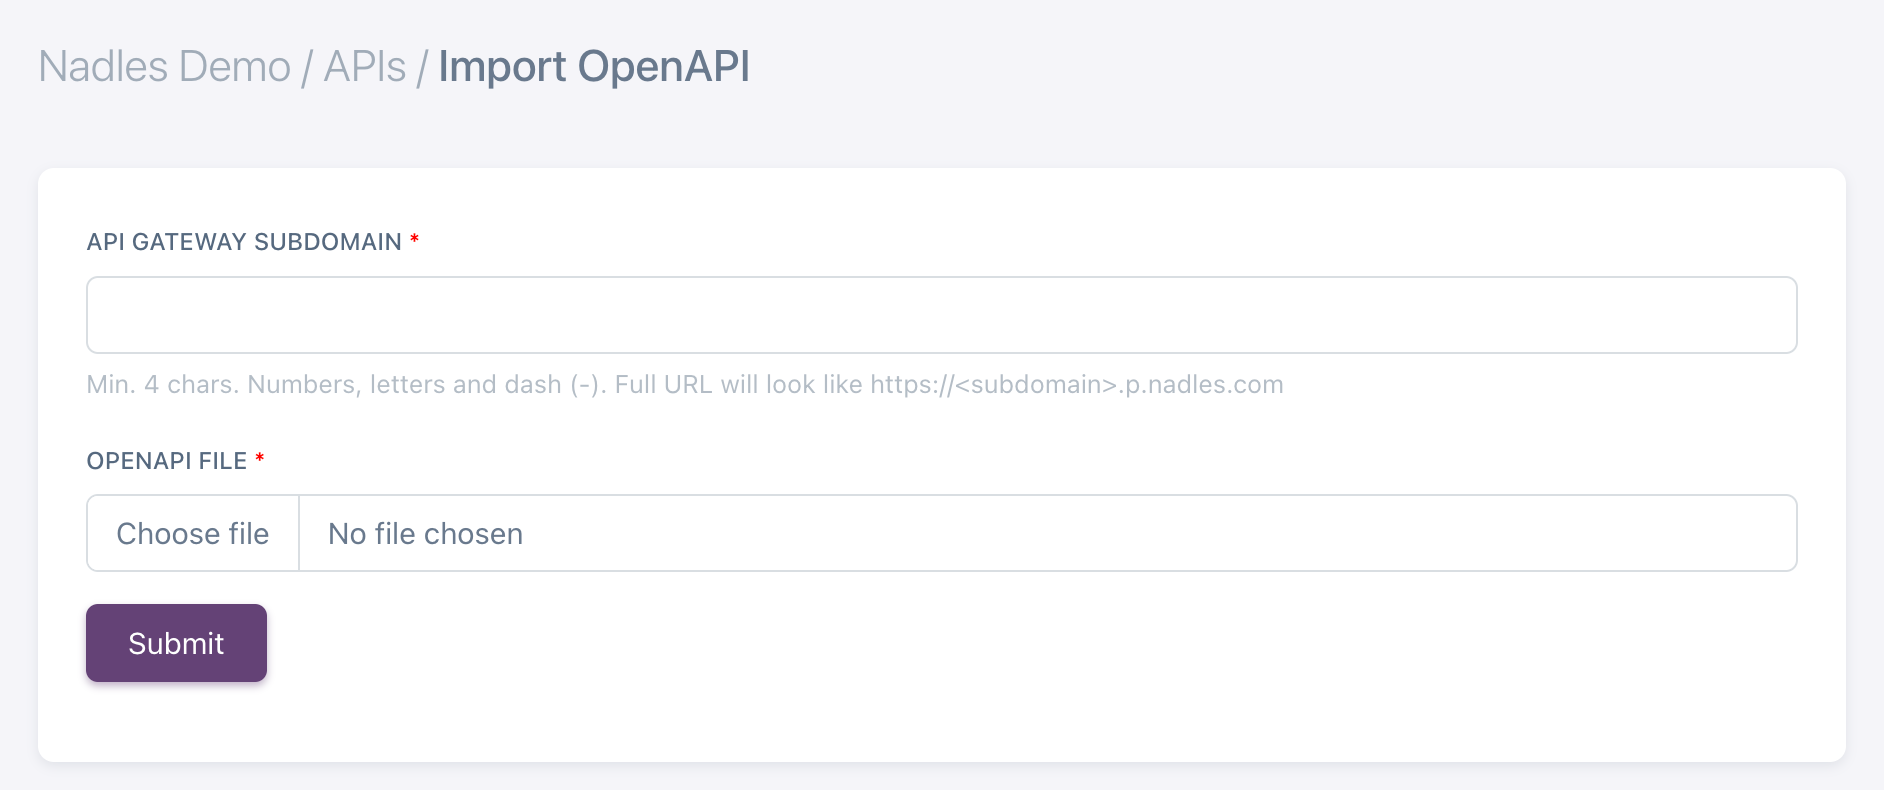
- Choose the subdomain for your API, select the OpenAPI file and click Submit.
By default, Nadles let’s you choose a subdomain for your API, so the URL to access your API looks like
https://<subdomain>.p.nadles.com/Later, you can configure Nadles API Gateway to use a custom domain for your API, e.g. https://api.mydomain.com. Learn more.Manually
Adding a new API
- Navigate to My APIs.
- Click “Add new API”.
- Fill in the details of your API.
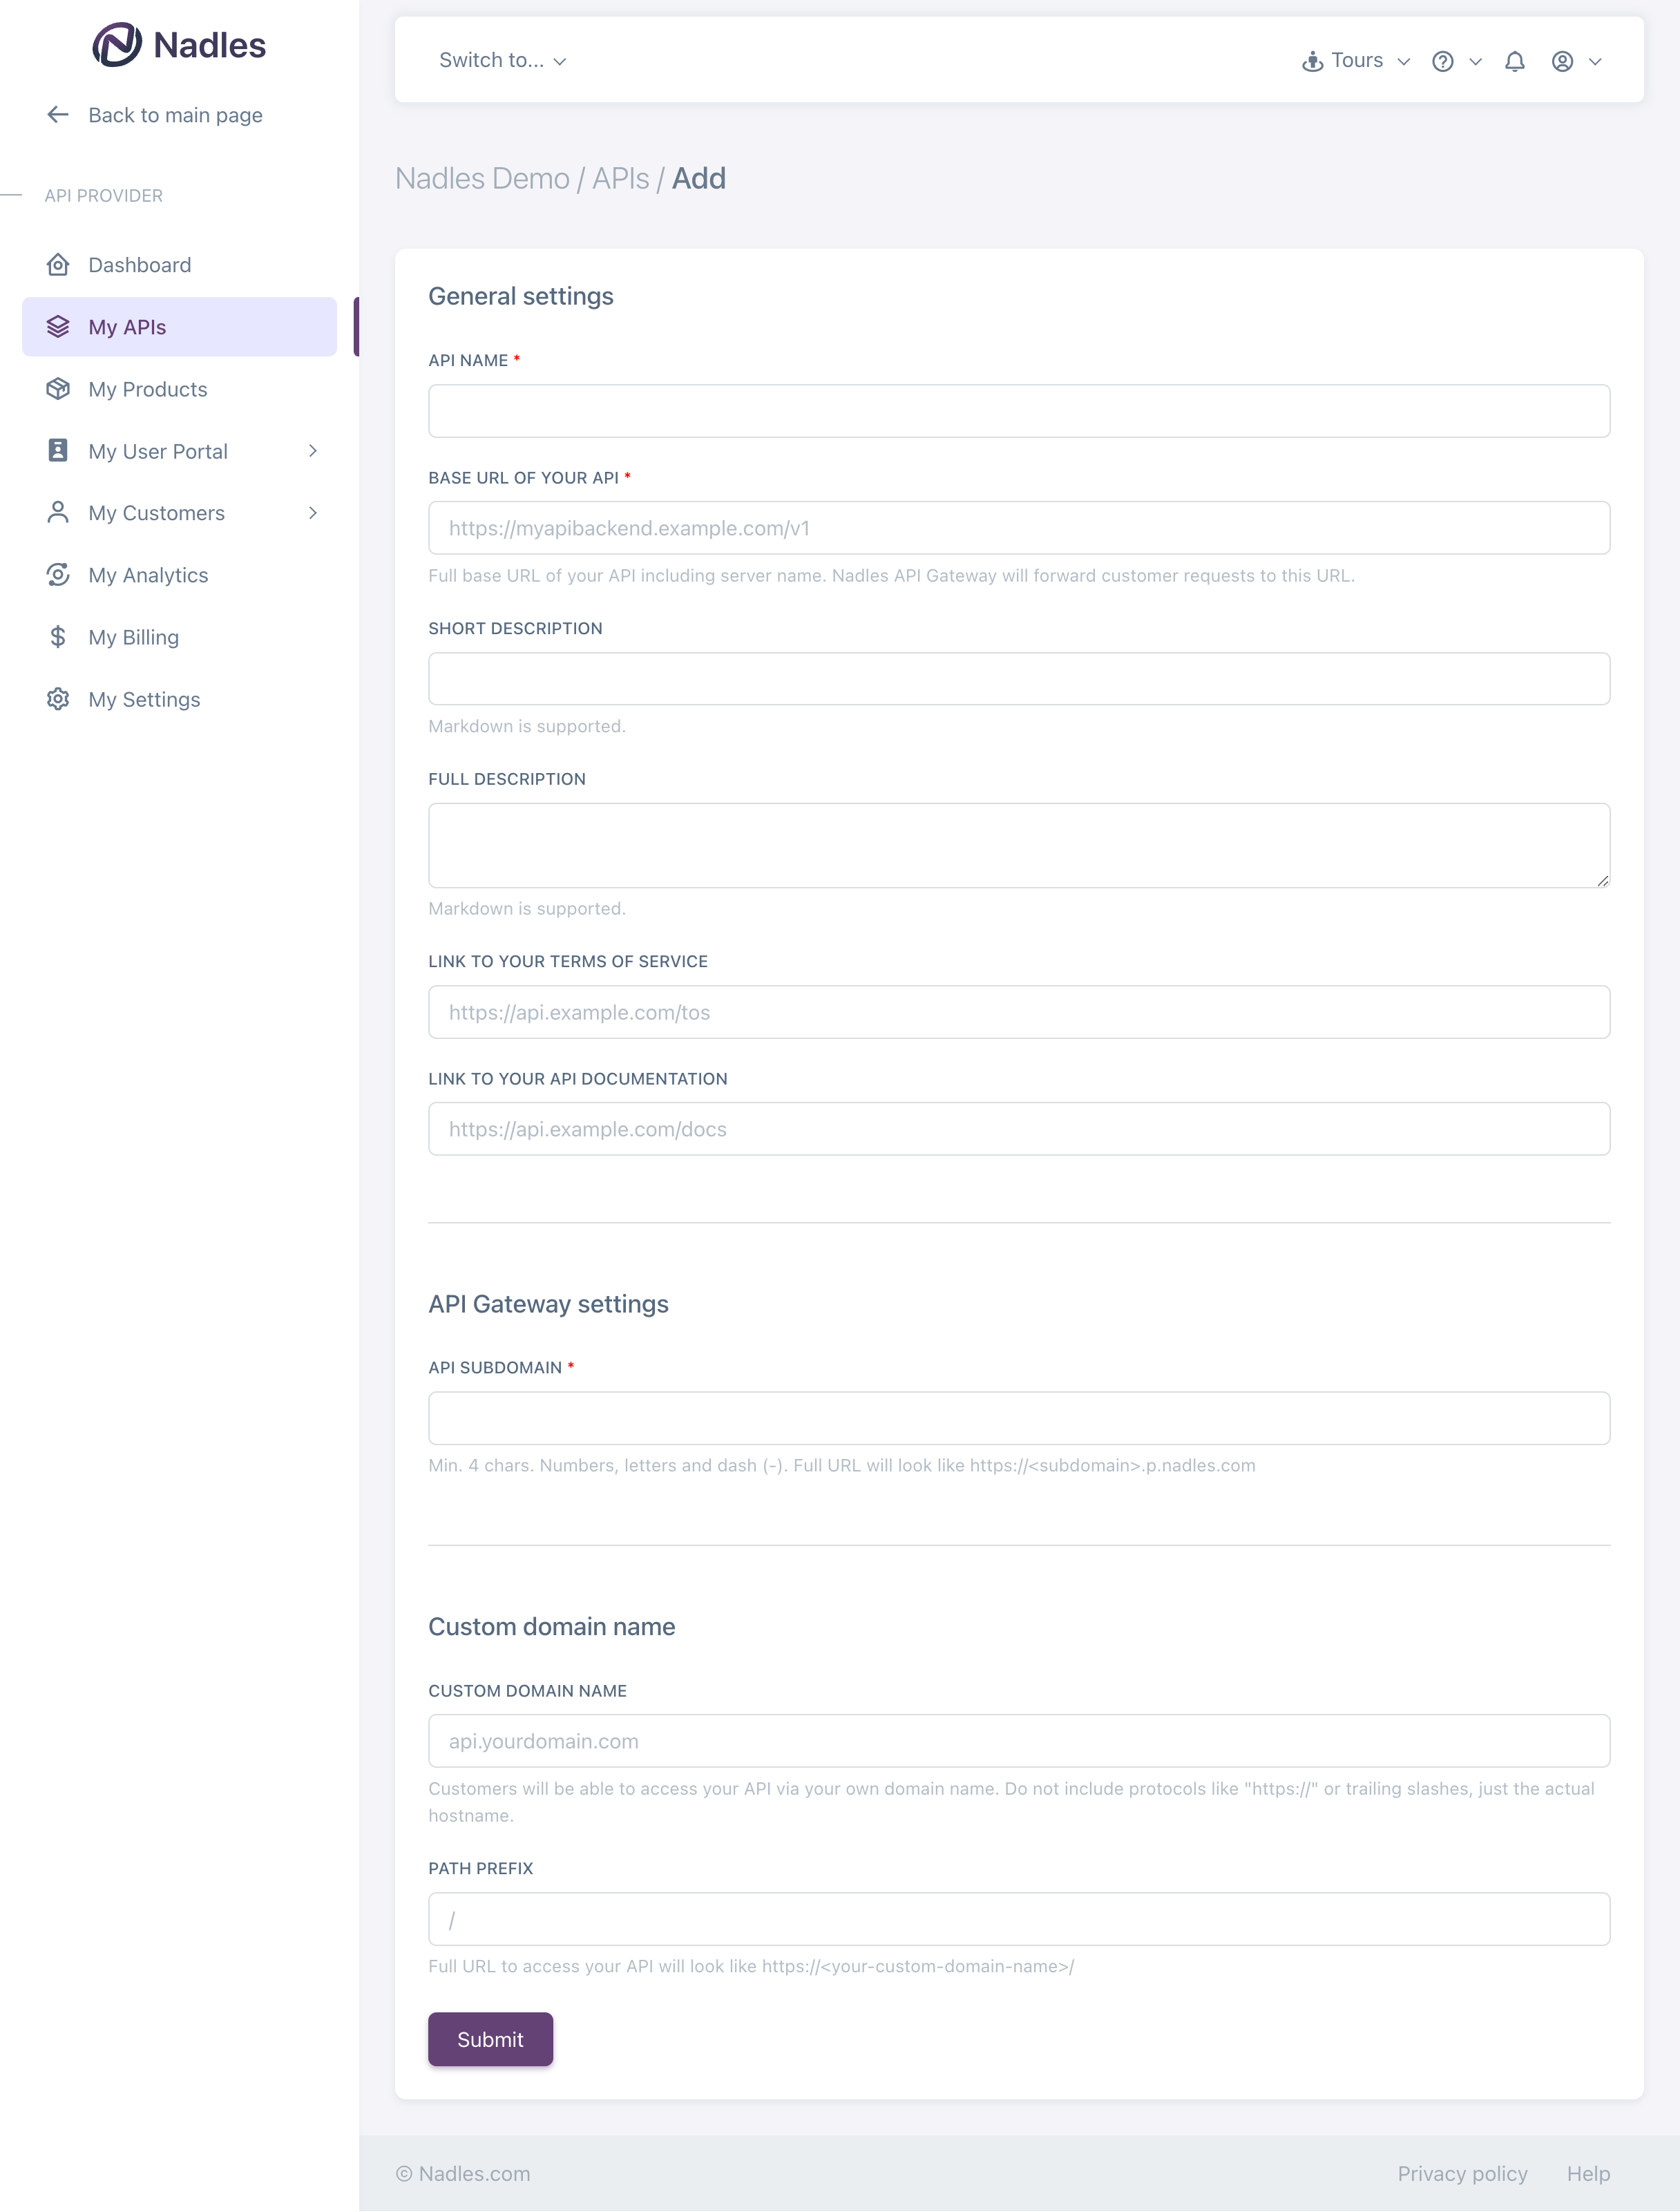
Base URL + Endpoint URL.
If your API has the following endpoints:
https://api.mydomain.com/weather-forecast/
https://api.mydomain.com/current-weather/then https://api.mydomain.com/ is the base URL.https://<subdomain>.p.nadles.com/
Later, you can configure Nadles API Gateway to use a custom domain for your API, e.g. https://api.mydomain.com Learn more
- Click Submit.
- After the API is added, you are redirected to the dashboard.
- On the dashboard there is now the Nadles API URL that should be used by your customers to make requests to the API.
Adding endpoints
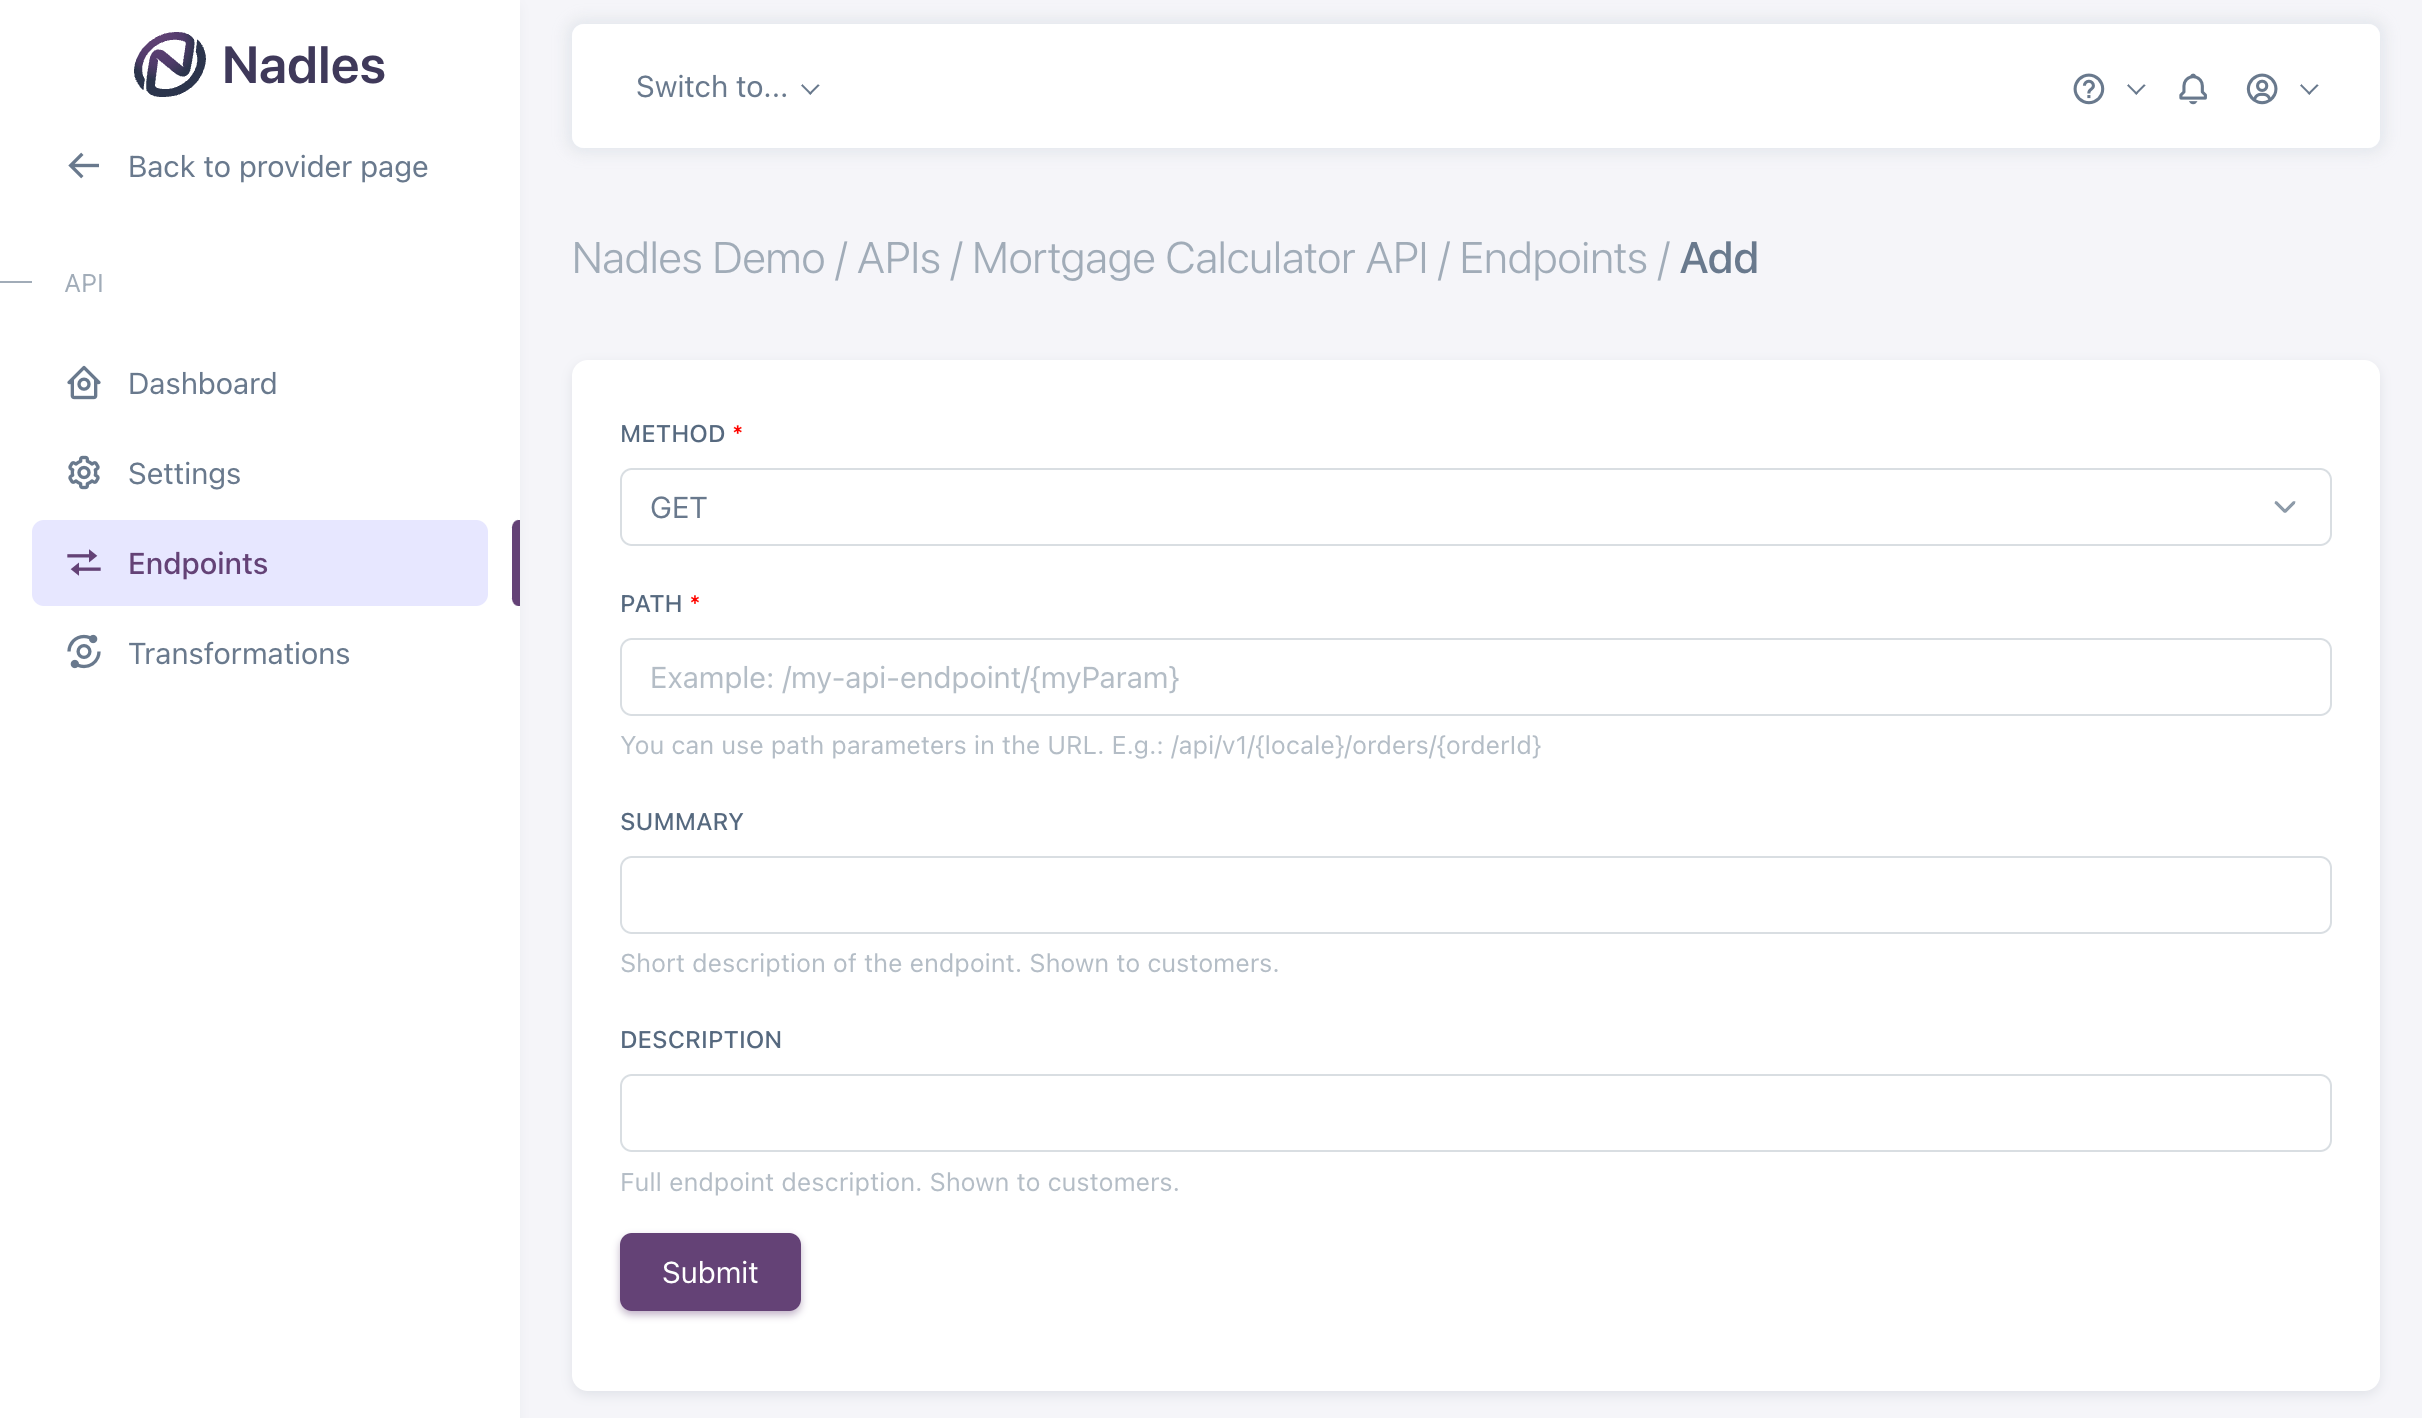
- Go to Endpoints section in the menu and click Add new endpoint.
- Choose a HTTP method and enter the endpoint URL relative to the base URL.
If your API has the following endpoints:
https://api.mydomain.com/weather-forecast/
https://api.mydomain.com/current-weather/then https://api.mydomain.com is the base URL and /weather-forecast/ and /current-weather/ are the endpoint URLs.- Path parameters can be used in endpoint URLs. These parameters can be used later to configure billable metrics, request transformations and rejection rules.
You can specify endpoint URLs like this:
GET /weather-forecast/{city}In this case, you will be able to later configure Nadles API Gateway to limit access to weather forecast for certain cities or charge different price for different cities.- Click Submit.