General
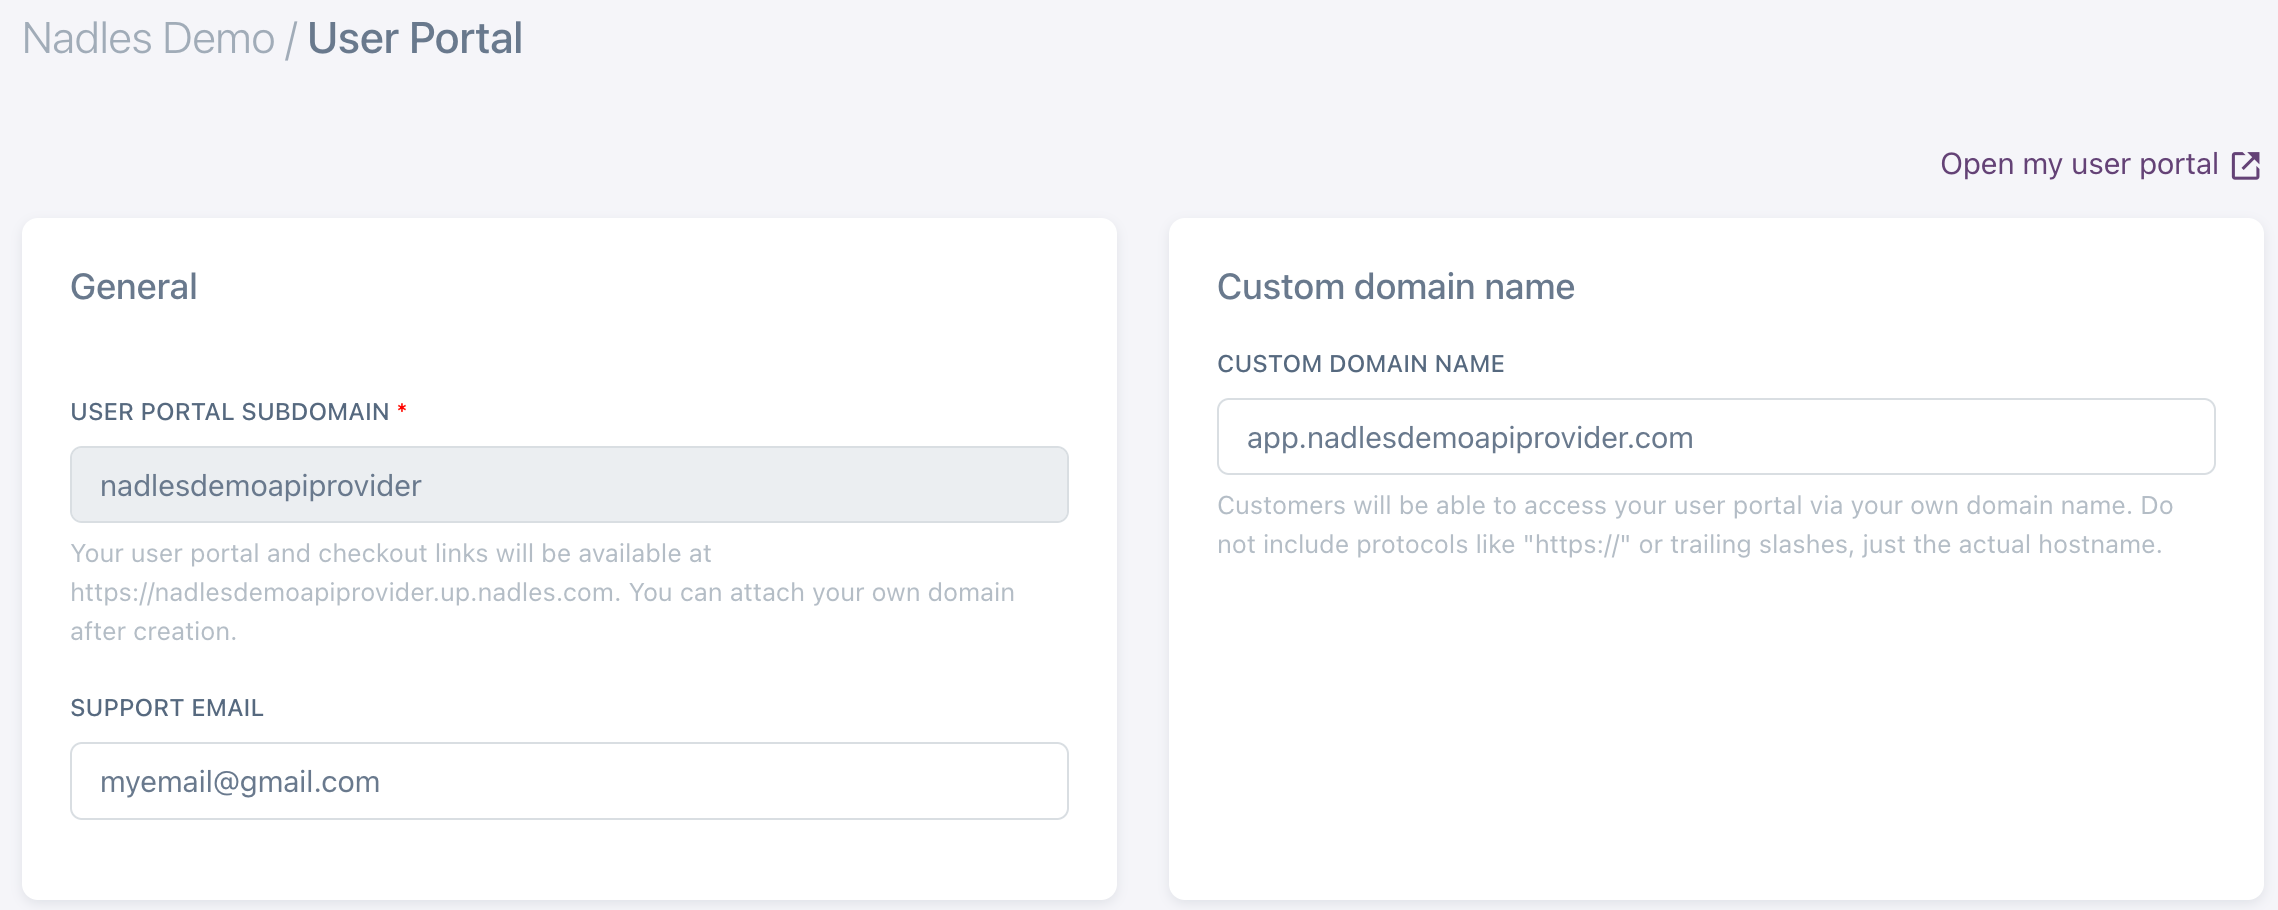
You can attach a custom domain name to your Nadles User Portal, so that, instead of Nadles domain (https://<subdomain>.up.nadles.com/), users access your portal by the domain name owned by you.
Attaching your own domain updates checkout link URLs to point to your user portal.
Setting up a custom domain name
To start, navigate to My User Portal → Settings. Enter the domain name you’d like to use for your user portal in the Custom domain name section.
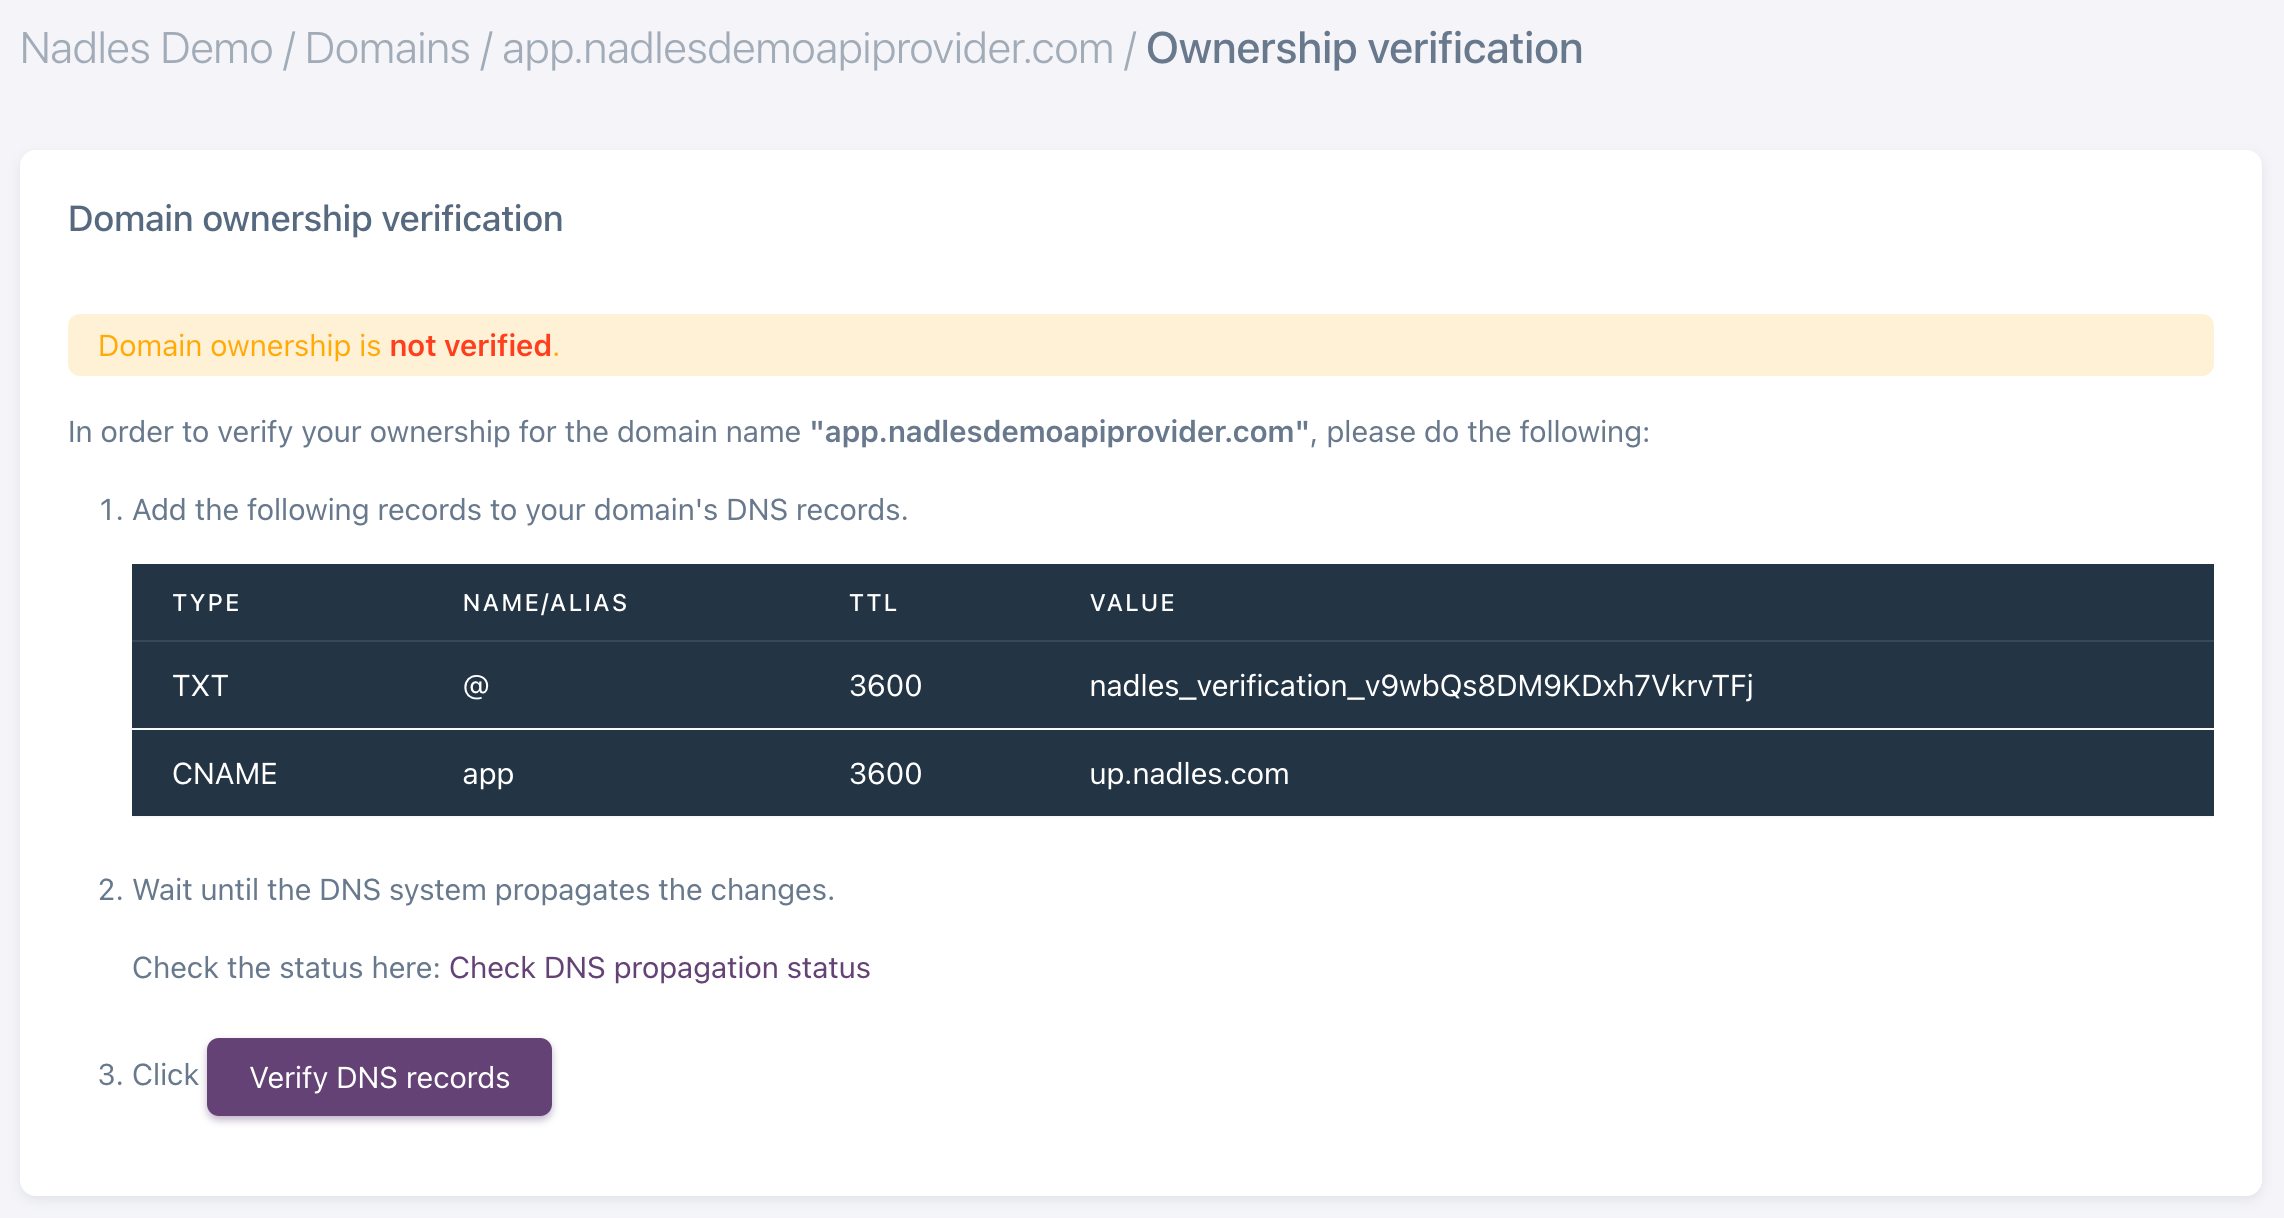
Ownership verification

- TXT record for the base domain with a unique value generated by Nadles.
-
CNAME record for the desired subdomain referencing the Nadles domain name for user portals,
up.nadles.com.
app.myfirstapi.com, so the two records to add to myfirstapi.com are:
| Type | Name | Value |
|---|---|---|
| TXT | @ | nadles_verification_8KcfbFwYGieHpqTY8… |
| CNAME | app | up.nadles.com |